 VizTools AI
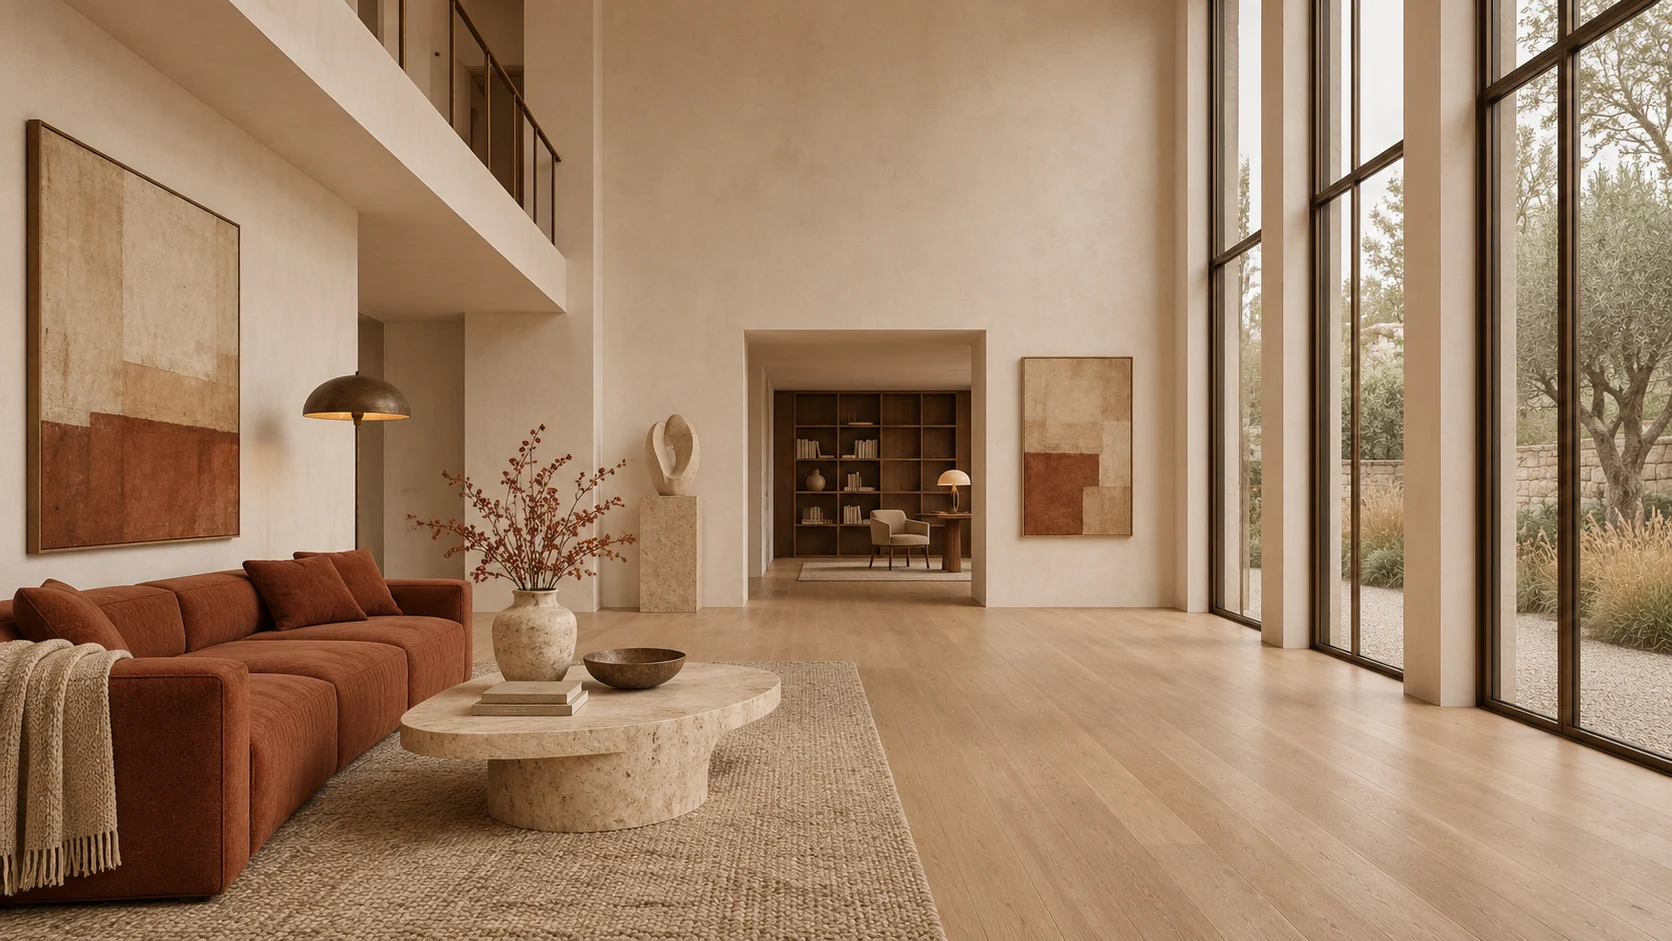
Editorial illustration created with ChatGPT. The open floor and visible doorway make the proposed camera path easy to explain.
Start with a render that already communicates the room well. A short video can then add a sense of depth, show the relationship between spaces or hold the viewer on a material detail. Before generating, decide which of those jobs the shot needs to do. A request to fly through the entire building asks much more of a single image than a small move toward a visible doorway.
The workflow below uses the illustrated living room as a planning example. The prompts are starting points for your own tests; no generated video or measured comparison is presented here.
On 5 November 2026, Google announced Gemini Omni 1.2 Flash with clips up to 15 seconds.
Prepare the image you actually want to animate
Keep the original render and export a separate working copy. Choose the delivery format before uploading: a landscape presentation and a vertical social clip may need different compositions. Crop deliberately, leaving enough space around the furniture and the feature the camera will approach. Check the crop itself; a narrow frame can remove the route that made a proposed move understandable.
Look closely at the source. A window that already has a broken mullion or a table with an ambiguous support is a poor reference for judging later changes. Correct those details in the source when possible. Save the approved crop with a clear filename so the next attempt uses the same image. Do not enlarge the canvas by guessing what lies outside the original frame when the design must remain accurate.
If your starting point is a sketch, prepare a still visualization with the sketch-to-render guide, then return to choosing the camera move.
Sketch to render in VizTools AI
Choose a movement that the visible space supports
For this room, begin with a short forward move along the empty floor. Stop before the rear doorway. That gives you an observable route without asking the camera to discover another room. A modest lateral move can suit a facade, provided the view already shows its depth. A locked camera can work for a material presentation where the composition matters more than a reveal.
Write down the endpoint in plain language: the table remains visible, the doorway stays near the center and the camera stays at eye level. These are criteria for judging the output, not a promise that a prompt will enforce them. For the first trial, choose a short duration supported by the selected model. Add a longer or more ambitious shot only after reviewing that result.
Runway's guide assigns composition to the input image and motion to the prompt.
Two prompts to adapt to your scene
Replace the named features with objects that are actually visible in your render. Describe a physical camera action and a stable scene. Keep the first request narrow enough that you can identify which part failed.
A short move into the room
A quiet view with a fixed camera
Remove the leaf movement if the exterior is not part of your image. If the tool has separate camera or motion controls, check that they agree with the written request. An orbit selected in a control panel and a forward move requested in text create an unclear brief.
Review the whole clip, then inspect individual frames
Watch once at normal speed to judge pace and composition. Then pause near the beginning, middle and end, and inspect any moment that looked unstable. A good opening frame does not validate the rest of the shot.
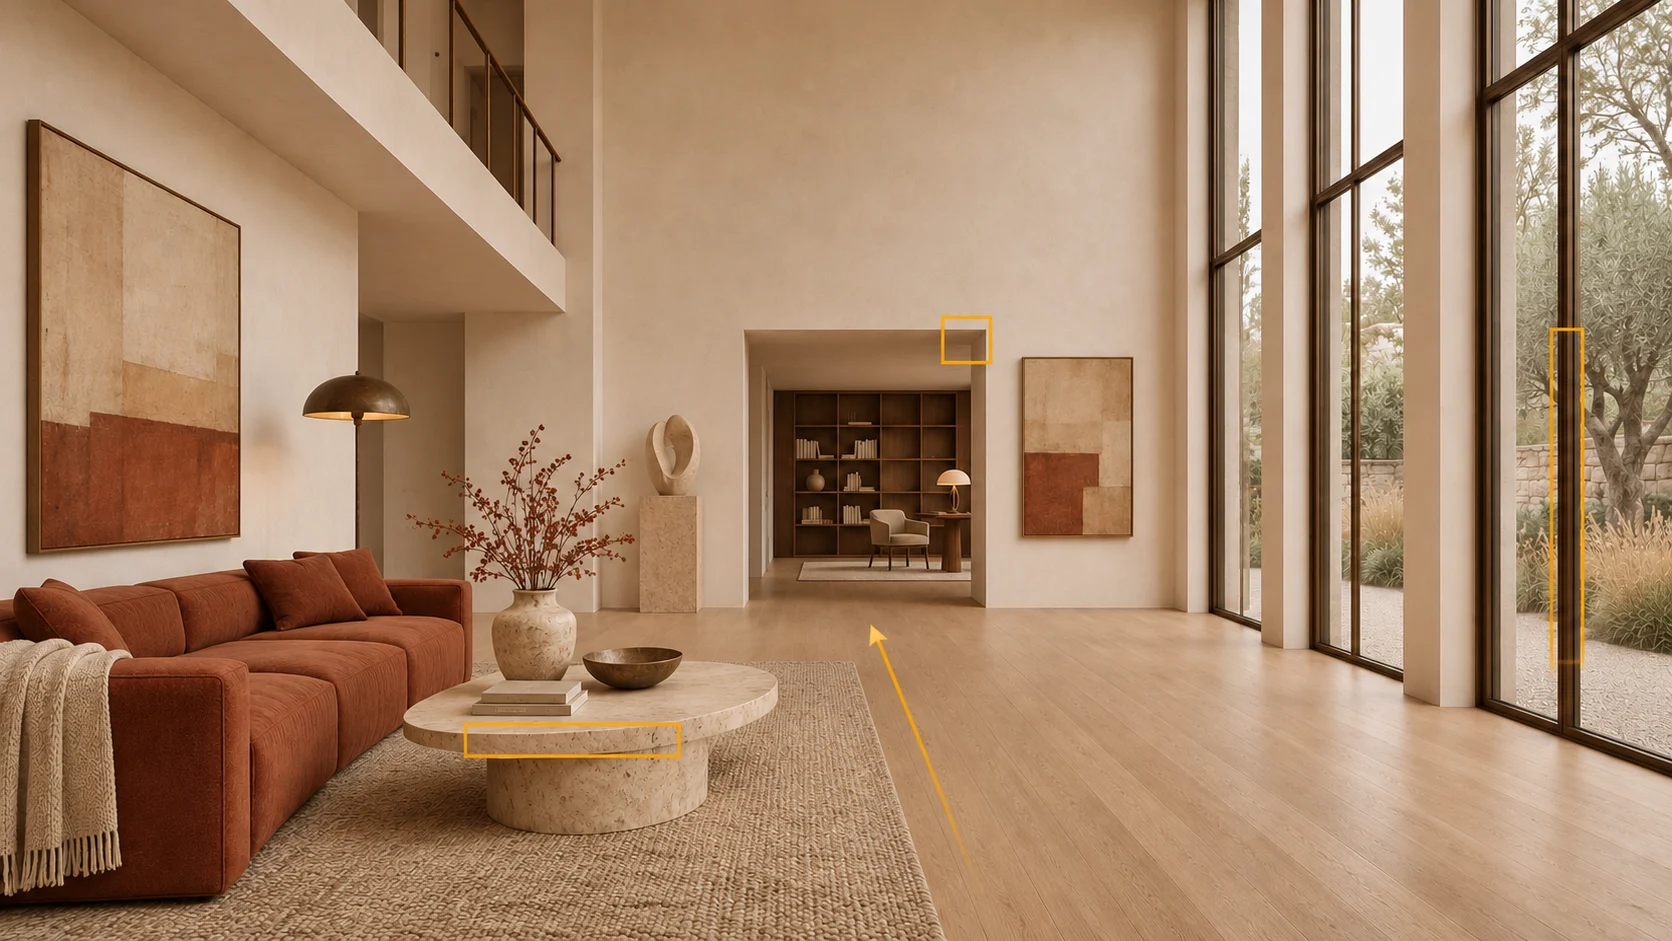
- Count the visible window divisions and check whether they change as the camera moves.
- Follow the doorway corners and the ceiling edge. Look for bending, sliding or a sudden change in thickness.
- Inspect the table edge and its support. Check whether furniture stays in contact with the floor.
- Watch reflections, exterior branches and shadow boundaries for discontinuities.
- Check the intended endpoint. Decide whether the final view still describes the same design.
Change the part that failed
- If the room seems to redesign itself, return to the approved source and shorten the move. Avoid building the next attempt on a frame whose geometry is already wrong.
- If the shot cuts unexpectedly, check whether the prompt describes several views or destinations. Try one continuous movement with a single endpoint.
- If the motion works but a critical detail deforms, assess whether a tighter crop or a different starting view would keep that detail readable. Do not hide a design change with a decorative transition.
- If the clip has a usable section, trim around it only when the remaining sequence still serves the presentation. Retain the original output and record the edit.
Keep a small record of each attempt
Save the source, crop, model name, settings, prompt, output and your acceptance notes together. Record the actual price shown before each run and include unsuccessful attempts when comparing costs. Changing one parameter at a time makes that record easier to use.
In VizTools AI, check the video models and input options currently available in your account before starting. This workflow does not establish that any particular announced model is available there. For a client presentation, keep the approved still render beside the video and identify the clip as an AI visualization. If a passage or object has changed, correct the result or choose another shot before delivery.
Use the VizTools AI architecture-video guide to continue working with your prepared still image.